This is a list of many of the icons used in the game and their meanings:


 Ability Type (Offense/Defense/Support): indicates the classification of an ability. Offense abilities typically are used to damage others. Defense are used to protect one from damage. Support are used to apply buffs or healing or various other things.
 Arc Sweep: an attack, typically melee, that targets 180 degrees in front of the attacker, hitting multiple targets. That usually includes the targeted grid square in front of the user as well as the one to the right and the left.
 Aberration: a type of creature with a bizarre anatomy and typically strange abilities.
 Abilities: special actions or spells that characters or creatures can use.
 Ability Level: (usually followed by a number) indicates the minimum level required to use an ability or spell.
 Ability Stamina: the amount of stamina expended when using an ability.


 Absorb: the ability to transfer part or all of a type of incoming ELEMENTAL damage into a weapon where it is then released on the next attack.
 Accuracy (ACC): the base chance that an ability or attack will succeed, minus any modifiers and the DEFENSE or MAGIK DEFENSE of the opponent. Generally, the ACC minus DEF is the chance to hit.
 Acid: a type of attack that tends to do outsized damage to armor due to its corrosive nature.
 Affinity: the preference for a given weapon, based on class, that grants an automatic +10 ACC bonus when using.
 Alchemist: a CLASS that specializes in brews and concoctions for various purposes. They excel at using a slingshot, with various ELEMENTAL shot types, plus various
  FLASK abilities.
 Ally/Preferred Weapon: when next to a character’s health and stamina bars, indicates that they are an ally of the player (useful for distinguishing allied summons amongst similar enemy monsters). When displayed over a weapon in an inventory list, indicates that the user has both an AFFINITY for the weapon and a corresponding weapon skill.
 Amphibian: a type of creature that generally lives on land but is comfortable in water. Many do not suffer penalties for taking actions in water, or take fewer penalties. Some can swim and act in deep water, but not all.
 Angelic: a type of creature that dwells with the Old Gods and does their bidding. They typically have wings and can fly and are immune to charm.
 Area-of-Effect (AOE): an ability that affects multiple targets within a given circle, either around the ability user or from a targeted center.
 Area-of-Effect Control: a skill that allows ability users to control the size of an area-of-effect target.
 Armor Accuracy Boost: a boost to accuracy provided by wearing a given piece of armor.
 Armor/Armor Skill: anything related to armors, or a skill that boosts armor-related stats.
 Armor Accuracy Penalty: an accuracy penalty typically from wearing cumbersome armors.
 Armor Condition: indicates the exact percentage of damage to armor, with 100% indicating no damage whatsoever. Armor mitigates up to its maximum armor value but does so pro-rated based on damage (e.g., armor with a value of 10.0 at 50% condition will act like armor with 5.0 at 100%). When armor condition reaches 0%, it essentially stops mitigating any damage until it is repaired in town.
 Armor Status: color indicators that overlay armor icons in the user’s inventory indicating their physical condition and effectiveness. Green armor is in good shape, although it may have slight damage. Yellow indicates condition is 40% or less, red is 20% or less.
 Attack Stamina: the amount of stamina used to mount an attack.
 Attributes: pertaining to STRENGTH, INTELLIGENCE, CONSTITUTION, DEXTERITY, CHARISMA or FORTITUDE.
 Automatic: an ability that triggers by itself under certain conditions without being selected.
 Automaton: a constructed being that typically runs based on an energy source, usually designed to guard places or objects.
 Auto-wake: a skill that automatically wakes the user if they are ambushed while sleeping during camping. Druids and Rangers automatically have this.
 Barrage: multiple random projectiles blanket an area. Usually, damage is done only when a given projectile hits a target and this can happen multiple times.
 Beast: a non-humanoid type of creature that is part of a typical natural ecology, although they can differ or be enhanced from the norm.
 Bleed: a status effect that indicates the affected person is losing blood every turn, which causes both HP damage and full Raw HP damage (100% of HP damage is applied to MAXIMUM HEALTH).
 Bleed Resistance: the percentage chance of resisting a BLEED affliction. It will also reduce BLEED damage sustained by that percentage. This is a PHYSICAL RESISTANCE.
 Blind: a status effect that indicates the affected person’s ability to see is impaired. This usually results in ACC and DEF being reduced by 50% and ability/weapon range being reduced by 2.
 Blind Resistance: the percentage chance of resisting a BLIND affliction. This is a PHYSICAL RESISTANCE.

 Blocking (Weapon/Shield): a boost to DEF from wielding either a weapon or a shield. If wielding both, only the higher value of the weapon or shield is used.
 Boost: an indicator that the user is receiving some sort of temporary positive stat bonus, usually from an ability (e.g., buff). The details can typically be seen by clicking on the icon below the afflicted’s portrait on the ATTRIBUTES screen.
 Charge: a type of ability that enables the user to move in a straight line in a cardinal direction (N, S, E or W), potentially damaging everyone that they pass and passing through their grid squares unimpeded.
 Charm: a status effect that causes the affected person to fight on behalf of their enemies by attacking allies.
 Charm Resistance: the percentage chance of resisting a CHARM affliction. This is not an inherent resistance like most but based on INTELLIGENCE and CHARISMA.
 Chop Tree: an ability that permits you to chop down a tree, thereby clearing a path through. It can also allow you to drop it over an adjacent river to create a bridge.
 Chance/Die Roll: the likelihood of a particular action being successful. Typically this is expressed as a percentage and then a random number from 1 to 100 is generated. If the random number is equal to or below the percentage required, then the result is accomplished or successful. If the random number is above the percentage required, the result is unsuccessful. On rolls to determine if an attack hits or misses, a roll of 1-5 is always a hit and a roll of 96-100 is always a miss, regardless of the original percentage.
 Charisma: an attribute that primarily modifies buying and selling prices for the main character as well as the chance of positive effects from activities in town. Also can boost the effects of HOLY abilities.
 Charisma Check: a roll to see if a particular event occurs. Successful if the roll is at or below the sum of all party members’ CHARISMA, +/- 4 based on MORALE (hirelings only), +5 for each Paladin, and -5 for each Rogue. For example, a main player that is a Paladin with a CHR of 10 and a Fighter hireling at full Morale (
 ) with a CHR of 8 has a 27% chance of a successful Charisma Check (10 + 5 + 8 + 4).
 Cleric: a CLASS that specializes in providing support to others, whether through healing or defensive buffs, through meditative focus and
  PSYCHIC clarity. But they are no pacifists as they excel at melee combat and the use of crossbows. However, they only use blunt melee weapons.
 Cone: an ability that targets a swath of area in front of the user, getting wider the further it goes and potentially affecting multiple targets.
 Confused: a status effect that causes the afflicted to often make irrational decisions or attack allies.
 Confuse Resistance: the percentage chance of resisting the CONFUSED affliction. This is a MENTAL RESISTANCE.
 Constitution: an attribute that primarily affects the amount of health and stamina that you have. Also affects MAGIK/SPELL RANGE, PSYCHIC AREA-OF-EFFECT, and PHYSICAL RESISTANCES.
 Cooldown: The number of turns (or minutes outside of combat) after an ability is used before it becomes available again.
 Critical Hit/Damage: CRITICAL HITS do an additional 50% damage. A critical hit is performed when the roll is at least 25 below that required to hit normally (e.g., if chance to hit is 35%, rolling 10 or below is a critical hit).
 Counterattack: indicates that someone has prepared a counterattack. If attacked, and missed, the user will get an automatic melee attack against the attacker. Counterattacks typically drain a small amount of stamina each turn they are maintained.
 Curse: a negative affliction that can only be cured by the wandering Crone that comes into town periodically. They tend to be worse than the normal negative affliction. Some abilities can alleviate the symptoms of curses temporarily, but not cure them.
 Damage/Offense Skill: indicates the amount of physical damage done by a weapon, ability or attack. Also indicates a skill that is offensive in nature.
 Darkness Penalty: an accuracy penalty due to having limited light. Some skills can mitigate this, and some creatures can see perfectly well in the dark and are not affected by this. In complete darkness, the penalty can be as high as 75%. Many AOE type abilities (e.g., explosions) tend to disregard darkness penalties.
 DEFEND: a state in which the user is anticipating the next attack and receives a 50% DEF bonus. Once attacked, the DEFEND state is disengaged and all subsequent incoming attacks use a normal DEF. The user will also receive additional STAMINA REGENERATION if their turn begins and they are still using DEFEND.
 Defend Bypass: indicates that an ability bypasses the 50% DEF bonus of the target from using DEFEND.
 Defend Stamina: the stamina used to defend oneself.
 Defend Stamina Regeneration: the bonus to STAMINA REGENERATION at the start of the turn if using DEFEND.
 Defense (Melee/Ranged) or DEF/Defense Skill: the reduction applied to the attacker’s ACCURACY to determine the chance that an ability or attack will succeed, minus any modifiers. This only applies with melee or ranged attacks, or abilities that are physical in nature (as opposed to using MAGIK DEFENSE). Generally, the ACC minus DEF is the chance to hit. This symbol can also indicate a skill that is defensive in nature.
 Devout: indicates that an ability requires the DEVOUT status, which can be attained by praying at the Abbey and lasts four months. Applies to PALADINS only.
 DELAY: an action whereby someone passes their current turn to let allies go first, then their turn resumes afterwards. Costs 2 MP to enact and cannot use DEFEND on the deferred turn.
 Detect Trap: the ability to notice a trap before activating it, giving the subject the chance to leave it or to disarm it. Intelligence and level contribute to this stat. Additionally, Rogues and Rangers have inherent bonuses.
 Dexterity: an attribute that is a measure of your agility and nimbleness. It contributes to MOVEMENT POINTS, INITIATIVE, MELEE/RANGED DEFENSE, MELEE/RANGED ACCURACY, and ability ACCURACY for SPELLS. Also contributes to FLASK ability area-of-effect.
 Disarm: when a hand-held weapon is knocked out of an opponent’s hands, or they drop it when panicked. The victim typically takes one action to pick it back up and one action to equip it.
 Disarm Trap: the ability to render a trap harmless. Intelligence, Dexterity, and level contribute to this stat. Additionally, Rogues and Rangers have inherent bonuses. Some abilities can also disarm traps.
 Disease: a particularly nasty negative effect that can generally only be removed by the HERBALIST in town.
 Disease Resistance: the percentage chance of resisting a DISEASE. This is not an inherent resistance like most but based on FORTITUDE and RANGERS and DRUIDS have natural boosts to their resistance.
 Dismiss: removes an npc from your employ.
 Down: a status effect indicator that shows the character is sitting on the ground. Down characters cannot act and will automatically stand up during their next turn (if possible), using up their action and movement for the turn. While Down, a character has a zero DEF.
 Dragonoid: a type of creature with dragon-like traits, such as scales, possibly wings, and some sort of elemental breath type of attack. Generally they are highly intelligent.
 Druid: a CLASS that is in tune with the natural world and specializes in focusing the power of the Universe. They tend to have nature-based magikal spells.
 Dual-Wield: the aptitude to wield a one-handed weapon in each hand. Only Rogues can do this, and the weapon in the left hand must be a dagger. Dual-wielding typically improves both ACC and BLOCKING, and the DAMAGE done is the amount of damage from the weapon in the right hand and half of that from the left hand.
 Dual-Wield Accuracy: the ACCURACY of a weapon, or a bonus to its ACC, when dual-wielding it.
 Dual-Wield Blocking: the BLOCKING of a weapon, or a bonus to its BLOCKING, when dual-wielding it.
 Dual-Wield Damage: the DAMAGE done by a weapon, or a bonus to its DAMAGE, when dual-wielding it.
 Duration: the number of turns, or minutes outside of combat, that an ability’s effects will last.
 Elemental (creature type): creatures that are the corporeal incarnations of the basic elements of life (fire, earth, air, and water), or a combination of them. They typically have crystals embedded within and this is thought to power them.


 Elemental: types of damage that correspond to the natural forces of nature (fire, ice, shock, poison, and water).


 Enemy/Ally Targeting: indicates whether an ability targets only enemies (all red), only allies (all green) or both (half red/green).
 Equipped: indicates that a weapon, shield or armor is actively in use. Generally only one thing can be equipped in a given slot (e.g., right hand, head, gloves, etc.).
 Exhausted: a status effect that indicates the character is either out of stamina or winded such that they cannot act and their movement is severely limited. This generally only lasts a turn or two and then the character can resume normally and regenerate stamina again.
 Factor: a classification for the upgrading of abilities. Goes from Factor II to Factor IV. Not all abilities can be upgraded, and some do not factor but have specific ability upgrades.
 Fiend: an evil creature from one of the planes commonly referred to as “Hell”. Virtually all fiends are immune to poisons, and most are immune or have high resistance to fire.
 Fighter: a CLASS that excels in close-range melee combat. They are proficient in a whole range of weapons and tend to specialize in offensive abilities.
Fire: a type of ELEMENTAL damage that reduces HEALTH from excessive heat. Elemental damage also does 100% damage to MAXIMUM HEALTH. FIRE damage also has a chance to inflict PANICKED at a rate of 5% per point of HEALTH damage done.
 Fire Resistance: the percentage chance of resisting FIRE damage. Damage that is not resisted is still lessened by the percentage of the resistance. This is an ELEMENTAL RESISTANCE.
 Flammable: a substance that catches fire quickly and spreads to other adjacent flammable materials, burning anyone caught in it. Webs, grease, acids, and oils tend to be flammable.
 Flanked: an indicator that the target has multiple enemies attacking them from different directions with melee or physical ability attacks (ranged attacks do not count toward FLANKING). Prior to each character’s turn, for each subsequent incoming attack beyond the first, a 10% DEF penalty is applied, and this stacks, so the third attack is -20%, the fourth -30%, etc.. However, a defender’s DEF will never drop below zero. At the start of the character’s turn all flanking penalties are removed.
Flask: a type of ability, used only by Alchemists, that hurls a glass vial of a chemical substance that breaks upon impact, sometimes spreading beyond the target square.
 Flask Accuracy: the ACCURACY of a FLASK ability, or a bonus to its ACC.
 Flask Area-of-Effect (AOE): the Area-of-Effect of a FLASK ability, or a bonus to its AOE.
 Flask Damage: the DAMAGE done by a FLASK ability, or a bonus to the damage.
 Flask Range: the RANGE of a FLASK ability, or a bonus to that range.
 Flying: the affected character or creature hovers above the ground, although some flying creatures touch the ground when they are not actively moving between squares. Flying generally enables them to pass over normally impassable terrain, such as water or low blocking objects, or pass over lava harmful grid squares without being affected (e.g., lava, traps, low static effects).
 Fortitude: an attribute that is a measure of your resilience. It contributes to STAMINA REGENERATION, MAGIK DEFENSE, and PHYSICAL RESISTANCES. It can also help mitigate PSYCHIC DAMAGE, avoid INJURIES, resist PARALYSIS, increase SPELL AREA-OF-EFFECT, and boost PSYCHIC abilities.
 Frozen: a status effect that generally prevents the afflicted from performing any action. They are, however, typically protected from outside attacks during the time, but will often take ICE damage each turn.
 Goblinoid: a category of creatures that includes Goblins and Hobgoblins, that generally can trace their lineage to Marzuk, the Prince of Exile. They tend to have organized societies set up on tribal lines. Most Goblinoids have strong immunity to poisons and possibly poison-based attacks.
 Healing: restores HEALTH POINTS. Keep in mind that while on an expedition, HP can never be healed beyond the current MAXIMUM HEALTH, which can only be recovered in town.
 Health Points (HP)/Maximum Health: an indication of how physically robust a character is. Health can never go above the current Maximum Health (also referred to as “Raw Health”). Damage reduces Health, while a proportion of that damage also reduces Maximum Health. Once a character reaches zero Health, any more damage will kill them. While Health can be restored through abilities or resting while camping, Maximum Health can only be restored once back in town.
 Holy: a type of ability, only available to Paladins, that is particularly damaging to Undead.
 Holy Accuracy: the ACCURACY of a HOLY ability, or a bonus to its ACC.
 Holy Area-of-Effect (AOE): the Area-of-Effect of a HOLY ability, or a bonus to its AOE.
 Holy Damage: the DAMAGE done by a HOLY ability, or a bonus to the damage.
 Holy Range: the RANGE of a HOLY ability, or a bonus to that range.
 Holy Resistance: the percentage chance of resisting damage or effects from HOLY abilities.
 Humanoid: a category of creatures that typically walk upright and have human characteristics, but not including actual humans, elves, or dwarfs. Most have some sort of social structure, culture, tool use, and build dwellings. They are typically distinguished from humans, however, by the level of their advancement.
Ice: a type of ELEMENTAL damage that reduces HEALTH from excessive cold. Elemental damage also does 100% damage to MAXIMUM HEALTH. ICE damage also has a chance to inflict SLOW at a rate of 5% per point of HEALTH damage done and drains 2x the amount of STAMINA.
 Ice Resistance: the percentage chance of resisting ICE damage. Damage that is not resisted is still lessened by the percentage of the resistance. This is an ELEMENTAL RESISTANCE.
 Immobile/Bound: a status effect whereby the afflicted cannot move from their grid square. Immobilized creatures can still use ranged attacks or abilities. Bound creatures cannot attack. Both statuses lead to a 33% reduction in DEF.
 Initiative: determines the order in which characters take their TURNS during a ROUND of combat. Generally, characters with a higher INITIATIVE go first, but the process is somewhat randomized at the beginning of each round. DEXTERITY is the primary determinant of this trait, but various status effects can modify it temporarily and some skills can boost it permanently.
 Injury: a negative affliction, typically from melee attacks, that can have negative stat modifiers until it heals. These can heal on their own, particularly through rest in town, but the HERBALIST and the HEALER can also cure them.
 Insect/Arachnid: a category of creature that typically has multiple (6 or 8) legs and an exoskeleton. They have a strong communal ethos, whether through instinct or otherwise. Many insects have wings although not all can fly.
 Intelligence: an attribute that is a measure of your mental powers. It affects MAGIK ACCURACY, MAGIK DAMAGE, MAGIC DEFENSE, plus MENTAL RESISTANCES. It can also boost PSYCHIC RANGE.
 Invisible: the affected character or monster cannot be seen. They are, however, still physically present and will block movement through their grid square. When attacking, they gain a SURPRISE BONUS.
 Knockdown Resistance: the percentage chance of resisting a KNOCKDOWN affliction (the result of which is DOWN status). This is a PHYSICAL RESISTANCE.
 Layaway: a plan at the Merchant that allows you to put 10% down to hold the item for up to 12 months.
 Levitate: the affected character or creature is levitating above the ground. This enables them to pass over normally impassable terrain, such as water or low blocking objects, or pass over lava harmful grid squares without being affected (e.g., lava, traps, low static effects).
 Light/Light Penalty: some abilities, weapons, shields or armor can be or provide a light source. The relative level is indicated by one or more “+” or “-” signs following it. Some creatures are not used to light and receive an ACC penalty when exposed to light (similar to DARKNESS PENALTY in reverse).
 Lockpicking: allows the user to attempt to open a locked door or container (provided they have a lockpick). This requires a Lockpicking skill to be able to pick locks, although their skill level at it depends on other factors. Rogues automatically have this skill.


 Low Stamina: indicates that the character or monster’s stamina is below 50% and will incur ACC and DEF penalties. Red is below 10%, yellow is below 25% and white is below 50%.
 Mage: a CLASS that specializes in studying ancient knowledge. They focus on the application of magiks, both offensively and defensively. They are the only class that can wield a wand.
 Magik Defense (MGK DEF): the reduction applied to the attacker’s ACCURACY to determine the chance that an ability will succeed, minus any modifiers. This only applies with inherently magik attacks, such as a wand or a staff at range, or abilities that are not physical in nature (those use DEFENSE). Generally, the ACC minus MGK DEF is the chance to hit.
 Magik Resistance: the percentage chance of resisting MAGIK attacks or damage.
 Magik/Spell: indicates a type of ability that is associated with spell-casters, such as Mages and Druids. Wands are also inherently magik in nature.
 Magik/Spell Accuracy: the ACCURACY of a magik ability, or a bonus to its ACC.
 Magik/Spell Area-of-Effect (AOE): the Area-of-Effect of a magik ability, or a bonus to its AOE.
 Magik/Spell Damage: the DAMAGE done by a magik ability, or a bonus to the damage.
 Magik/Spell Range: the RANGE of a magik ability, or a bonus to that range.
 Marked: indicates that the afflicted has been specifically targeted and all enemies (or anyone that is CONFUSED whether friend or foe) will attack regardless of their stamina or other potential targets. Those marked incur a FLANKED penalty on each turn.
 Melee: a type of attack or ability that is physical in nature, usually involving weapons and up close. They can also only be targeted in the cardinal directions (N, S, E and W).
 Melee Accuracy: the ACCURACY of a melee ability or weapon, or a bonus to its ACC.
 Melee Defense: typically a modifier to normal DEFENSE against incoming MELEE attacks (will not affect DEFENSE from RANGED attacks).
 Monstrosity: a type of creature that tends to be frightening and abnormal compared to those from the natural world. Most are unnatural and have evolved through experimentation.


 Morale: a colored indicator of the contentment of npc’s. Lower (red hues) morale leads to negative ACC and DEF penalties while higher (green) gives bonuses. Morale icons also display four boxes below which turn from white to blue to indicate the progress to the next higher level of morale (e.g.,
  shows they are half-way to the next morale color level).
 Movement Points (MP): indicates how many grid squares a character or creature may move in a turn during combat before expending significant amounts of stamina.
 Muffled: indicates that the afflicted is making less or more noise than normal (usually followed by a percentage).
 Necrotic: a type of damage that tends to reduce RAW HEALTH more than normal attacks. It can vary depending on the source and also sometimes has other negative effects associated with it. It is more common with UNDEAD.
 Necrotic Resistance: the percentage chance of resisting NECROTIC damage.
 No [whatever]: combined with another icon, indicates the opposite. For example, if combined with the BLEED icon that would indicate that an ability cures the BLEED effect.
 No Attack: indicates that the afflicted cannot attack for some reason (usually the result of an ability).
 No Magik: indicates that the afflicted cannot use magik or spells for some reason (usually the result of an ability).
 One-Handed: a type of weapon that can be held with one hand, allowing the other hand to wield another object.
 Opportunity Attack: a special ability that allows someone to attack enemies that pass by adjacent squares or move away from a square adjacent to the attacker, even if it isn’t their turn.
 Other: a type of creature that does not fit neatly into one of the other creature types.
 Paladin: a CLASS that focuses on service and obedience to the Old Gods. They typically excel at martial weapons and have natural anti-UNDEAD abilities.
 Panicked: a status effect that generally leads to the afflicted running away from enemies and they have a zero DEF while afflicted.
 Panic Resistance: the percentage chance of resisting the PANICKED affliction. This is a MENTAL RESISTANCE.
 Paralyzed: a status effect whereby the afflicted cannot move, attack or defend. Paralyzed victims have a zero DEF when attacked.
 Peer: a trait of some abilities that will reveal the location of treasures on the mini-map, usually within a given radius of the caster.
 Penalty: an indicator that the user is receiving some sort of temporary negative stat bonus, usually from an ability (e.g., affliction). The details can typically be seen by clicking on the icon below the afflicted’s portrait on the ATTRIBUTES screen.
 Physical: indicates that an ability has tangible force. Typically ineffective against SPIRITS (a type of UNDEAD that is immune to physical damage and runs entirely on STAMINA, not HEALTH).
 Physical Resistance: the percentage chance of resisting physical attacks or damage.
 Plant: a type of creature that has vegetative or fungal origins. Most have minimal intelligence and many are susceptible to fire. Many have camouflage.
Poison: a type of ELEMENTAL damage that afflicts the body’s systems and reduces STAMINA either one time or across multiple turns. Poisons do not do HEALTH damage.
 Poison Resistance: the percentage chance of resisting POISON damage. Damage that is not resisted is still lessened by the percentage of the resistance. This is an ELEMENTAL RESISTANCE.
 Precision: a trait of an ability that automatically targets the least armored part of the victim’s body, thereby typically resulting in more HEALTH damage incurred.
 Prior Hit: indicates that the afflicted was hit since their last turn and they will incur a 20% ACC penalty if they choose to attack.
 Protection: indicates that the character or creature has some sort of protection (usually magikal in nature) that will mitigate damage while enabled. Typically this sort of protection has a given number of HEALTH points that it will mitigate before disappearing.
Psychic: indicates a type of ability that is associated with manipulating the mind, often associated with Clerics but some creatures also have PSYCHIC abilities (sometimes also referred to as PSIONIC). Psychic abilities that do damage tend to bypass any type of physical armor (but not Magikal Protection, and there are exceptions).
 Psychic Accuracy: the ACCURACY of a PSYCHIC ability, or a bonus to its ACC.
 Psychic Area-of-Effect (AOE): the Area-of-Effect of a PSYCHIC ability, or a bonus to its AOE.
 Psychic Damage: the DAMAGE done by a PSYCHIC ability, or a bonus to the damage.
 Psychic Range: the RANGE of a PSYCHIC ability, or a bonus to that range.
 Psychic Resistance: the percentage chance of resisting damage or effects from PSYCHIC abilities.
 Pull: a trait of an ability that will pull the target next to the attacker.
 Push Item/Person: a trait of an ability that will push an item, character, or creature back one grid square.
 Pushback: a trait of an ability that will push the target back one or more grid squares. The victim will also have their MP halved on their next turn.
 Quantity: indicates that a given ability can be used only a certain number of times per expedition or per battle.
 Rally: an event that can happen to the player’s party at the start of any combat, dependent on a successful CHARISMA CHECK. A RALLIED party gains +20% ACCURACY, +33% MP, and +100%
  STAMINA REGEN for 4 rounds.
 Range: indicates the maximum distance away from the user that can be targeted. When followed by WPN it indicates that the ability uses the same RANGE as the equipped weapon.
 Ranged: a type of attack or ability that can be fired from a distance or up close and is not limited to cardinal directions.
 Ranged Accuracy: the ACCURACY of a RANGED ability or weapon, or a bonus to its ACC.
 Ranged Damage: the DAMAGE done by a RANGED ability or weapon, or a bonus to the damage.
 Ranged Defense: typically a modifier to normal DEFENSE against incoming RANGED attacks (will not affect DEFENSE from MELEE attacks).
 Ranged Range: the RANGE of a RANGED ability or weapon, or a bonus to that range.
 Ranger: a CLASS that feels more comfortable in a tent in the woods. They tend to be excellent archers, see farther than others, and are difficult to ambush.
 Raw Damage: a trait of an ability that can apply more (or less) than the normal ratio of HEALTH DAMAGE to MAXIMUM HEALTH. Usually followed by a percentage.
 Recruit: adds an npc to your employ.
 Reload: some weapons, like crossbows, require an extra turn during combat to load the projectile. This takes the action for the turn and they cannot attack or use an ability, but the person can still use DEFEND (provided they haven’t moved outside the “green zone”).
 Reptilian: a type of monster that is cold-blooded, has scaly skin, usually has a tail, typically lays eggs, and has scales covering their body. They may or may not walk on all fours or upright. There is a wide range of capabilities as some are barely above animals in nature whilst others have organized societies, tool and weapon use, and even primitive speech.
 Resistance: the ability to block or reduce damage or effects of a given type (the icon of the type will be displayed in the shield icon, like BLEED RESISTANCE).
 Revive: a trait of a skill that will automatically revive the character if they die. Can only be used once per expedition.
 Ricochet: a type of attack that bounces off of each successive target that is hit, hurtling toward another random target. But each hit reduces the range and damage done.
 Rogue: a CLASS that are proficient fighters with both ranged and melee attacks. Their methods tend to be sneaky and aimed at disadvantaging others. By default they know LOCKPICKING and are the only class that can dual-wield a one-handed weapon along with a dagger.
 Self: indicates an ability that can only be used on oneself.
 Shield Accuracy Penalty: an ACC penalty that applies from the cumbersome nature of wielding a shield.
 Shock: a type of ELEMENTAL damage that reduces HEALTH from electricity. Elemental damage also does 100% damage to MAXIMUM HEALTH. SHOCK damage also has a chance to inflict STUN at a rate of 5% per point of HEALTH damage done. SHOCK damage will also travel through water to victims in adjacent squares (requires a separate “to hit” roll), except for the original caster.
 Shock Resistance: the percentage chance of resisting SHOCK damage. Damage that is not resisted is still lessened by the percentage of the resistance. This is an ELEMENTAL RESISTANCE.
 Size Differential: some abilities may give a bonus or penalty based on the size differential between the attacker and the defender.
 Skill: indicates a SKILL, which is a learned or inherent specialization trait.
 Sleep: a status effect that puts the afflicted to sleep. While sleeping they have a zero DEF and cannot move or act. However, any successful hit by an attack or ability will wake them up.
 Sleep Resistance: the percentage chance of resisting the SLEEP affliction. This is a MENTAL RESISTANCE.
 Slow: a status effect that temporarily reduces the afflicted’s MOVEMENT POINTS and INITIATIVE by half and their ACC/DEF by 25%.
 Slow Resistance: the percentage chance of resisting the SLOW affliction. This is a PHYSICAL RESISTANCE.
 Smash: using brute force and strength to open a door or container. This can sometimes lead to an INJURY if not successful.
 Spirit: a weapon or ability particularly useful against SPIRITS (a type of UNDEAD that is immune to physical damage and runs entirely on STAMINA, not HEALTH). SPIRIT weapons or abilities do 3x the normal damage to the creature’s STAMINA.
 Stamina: a trait that controls the amount of actions and movements a character or creature can perform. Low STAMINA will result in decreased ACC/DEF, possibly not having enough to use abilities or attack, or becoming EXHAUSTED. As actions are performed, the character’s stamina is reduced. Stamina can be recovered through STAMINA REGENERATION or by camping.
Stamina Regeneration: the amount of STAMINA that will be recovered in a given period of time, or at the start of a character or monster’s turn during combat. Using DEFEND at the end of a turn will increase STAMINA REGENERATION by 50%.
 Stunned: a status effect that prevents the user from moving or taking an action during their turn. While stunned they have a zero DEF.
 Stun Resistance: the percentage chance of resisting the STUNNED affliction. This is a PHYSICAL RESISTANCE.
 Swimming: indicates that a character is in deep water and has to swim. They cannot take normal actions, such as attacks or use abilities, and they suffer a 50% DEFENSE and MAGIK DEFENSE penalty and use up twice as much STAMINA for actions, including movement. Some creatures can act freely in deep water and do not suffer STAMINA penalties, or do not suffer as much. This icon can also indicate that a particular ability can be used while swimming in deep water.
 Teleport: The ability to immediately move from one spot to another without using any MOVEMENT POINTS.
 Trap: indicates the results of finding a trap. Generally, avoiding triggering a trap depends on the user’s INTELLIGENCE and the complexity of the trap. Rangers have a better chance of avoiding triggering it and Rogues have a significantly better chance.
 Two-Handed: a type of weapon that requires both hands to wield.
 Undead: a type of creature that was once alive but is brought back partially from the dead through necromancy or a curse.
 Volley: a type of ranged attack that arcs and can go over the head of others or low objects between the attacker/caster and the target.
 Wading: indicates that a character is in water up to about their waist. They can typically take normal actions, such as attacks and use abilities, but they suffer a 25% DEFENSE and MAGIK DEFENSE penalty and use up 50% more STAMINA for actions, including movement. Some creatures do not suffer STAMINA penalties in water or do not suffer as much.
 Walk Stamina: indicates stamina expended by walking. Some abilities can lower or raise this.
Water: a type of ELEMENTAL damage that reduces HEALTH on susceptible creatures (typically fire-based, all others take no damage). Elemental damage also does 100% damage to MAXIMUM HEALTH. WATER damage also has a chance to inflict PANICKED at a rate of 5% per point of HEALTH damage done. Can also extinguish ground fires.
 Water Walking: indicates an ability that allows you to walk on the surface of any body of water. Normally, you can take normal actions while doing so and suffer no STAMINA penalties.
 Weakness: a status effect that cuts normal MELEE DAMAGE and STAMINA REGENERATION in half.
 Weak Resistance: the percentage chance of resisting the WEAKNESS affliction. This is a PHYSICAL RESISTANCE.
Weapon Damage: an ability that displays this does the same amount of damage as the equipped weapon, although there may be a modifier after it, such as +25%.
 Weight: the amount that an item weighs. Characters can only carry up to their MAXIMUM CARRY WEIGHT before they are ENCUMBERED and cannot move. But significant weight up to that point can also burden them and lead to decreased STAMINA REGENERATION.


 Weight Burden: these icons indicate the degree to which the amount of WEIGHT carried as a proportion of a character’s MAXIMUM CARRY WEIGHT is burdening them. From left to right, they are LIGHTLY BURDENED, MODERATELY BURDENED, HEAVILY BURDENED, STRAINED and ENCUMBERED. LIGHTLY BURDENED will reduce STAMINA REGENERATION to 80% of normal, MODERATELY 50%, and HEAVILY to 0%. ENCUMBERED will also prevent the character from moving.
 Width: on LINEAR types of abilities, this indicates how wide (in grid squares) the line will be.
 ABILITY UPGRADES

 From time to time, the Mayor’s Clerk will solicit adventurers to complete
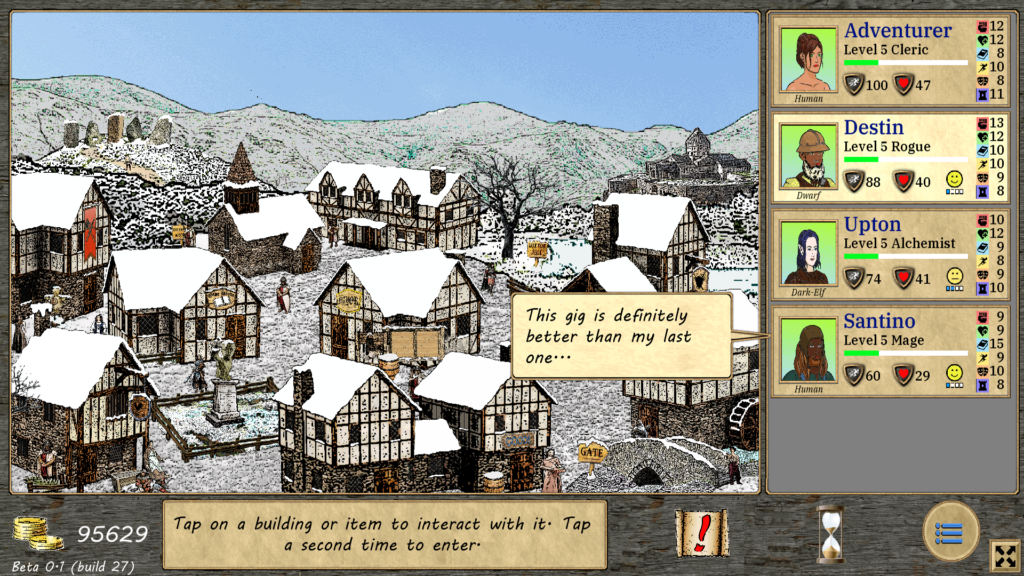


 Evervale Woods

 mists EXPERIMENT here to push the boundaries of science (plus blowing stuff up is fun). They also provide ABILITY TRAINING for Alchemists. The HERBALIST is also stationed here, who can cure diseases and is fairly skilled in fixing injuries.
 lded Dragon Inn
 nastery
 Blacksmith
 The Gate
 Merchant Layaway
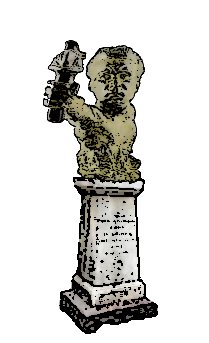 Evervale used to be a sleepy little town nestled in the foothills of the Middle Reaches. That was until the discovery made by the Unknown Traveler, for whom there is a statue in the center of town. Legend has it that the Unknown Traveler stumbled upon a cave nearby. In this cave he found strange
 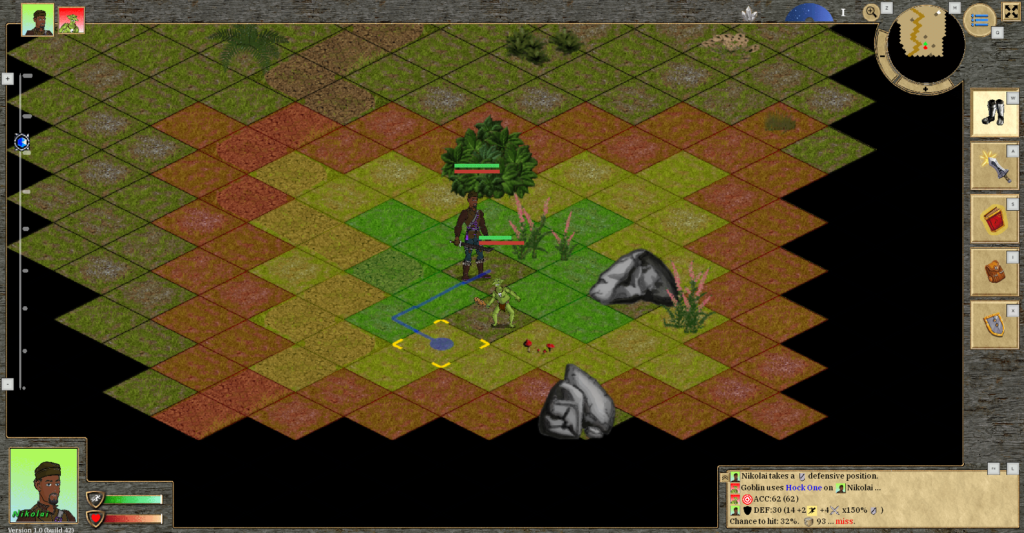 If you read the section on Weapons you’ll know that weapons come in two types:
 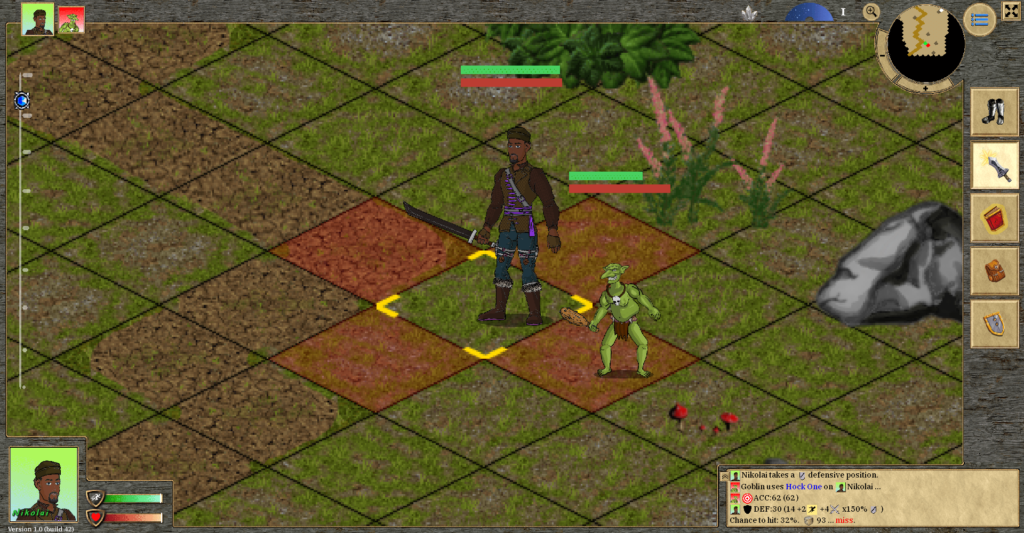 To attack, select one of the red squares and the targeting
 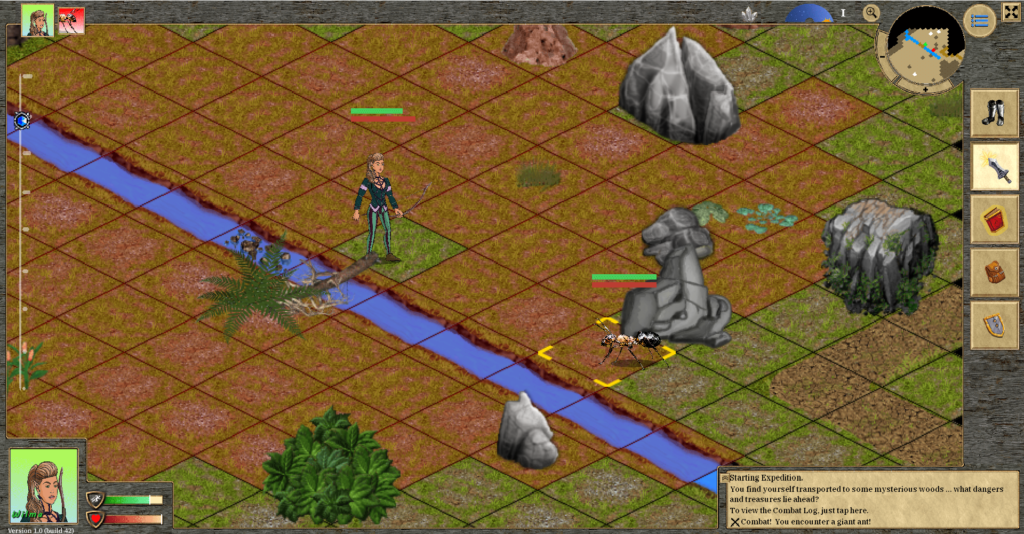 To attack with a ranged weapon, you also select the ATTACK button as shown above. However, the available targeting area will be significantly larger. How large depends on the range of the weapon itself plus any range-boosting skills or buffs you may have. Similar to melee weapons, you can attack over short objects (including shorter monsters). However, ranged weapons are subject to line-of-sight, which means that you can’t hit targets that are obscured by larger objects or normal-sized characters or monsters. If you look at the previous figure, you can see that the red targeting area does not extend beyond the large rock near the top of the screen. But the short boulder in the middle, even though it blocks movement, does not obscure line-of-sight behind it.
 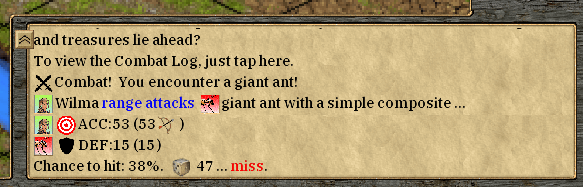 When you attack, you’ll see the actions occur on the screen. Typically you will hear appropriate sounds related to a hit or a miss, and on a hit possibly see some sort of blood spurt or effect on the victim indicating that. But you should also check your COMBAT LOG to see the specifics of the attack. Here you can see the results of Wilma shooting her bow at that giant ant. Start with the line where it says “Wilma range attacks…”. That shows the type of attack that occurred. The next line shows that Wilma’s ACC was 53. Below that you can see the giant ant’s DEF was 15. 53 – 15 = 38, which was the % chance to hit. The roll was a 47 (again, imagine a HUGE 100-sided D&D die being rolled) which resulted in a miss. Even though she missed, 38% for a level 1 character isn’t bad. That essentially means that she’s likely to hit 2 out of every 5 shots with her bow.
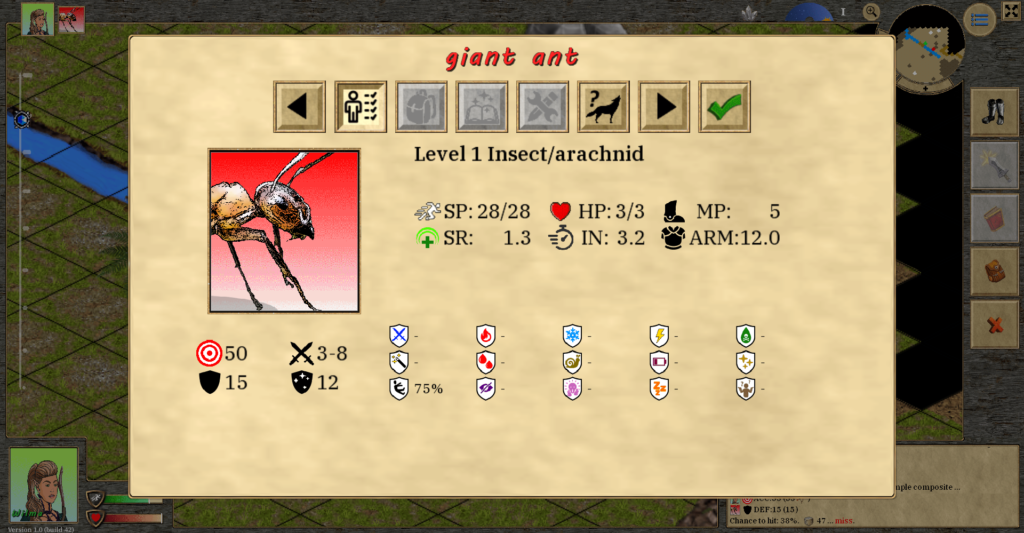 You can see from the screen above that the giant ant only has 3 HEALTH POINTS (HP), which is not a lot. Wilma’s bow does 1-4 damage, plus she has a 20% damage bonus (so she’s really doing 1.2 to 4.8 damage — damage done is rounded to one decimal place, even though the HP here shows a whole number). But the giant ant also has 12 ARMOR. But this is a total number for its entire body — individual body parts have less. So that’s going to protect it a little bit. Still, Wilma likely only has to land 2 or 3 hits to kill this monster.
 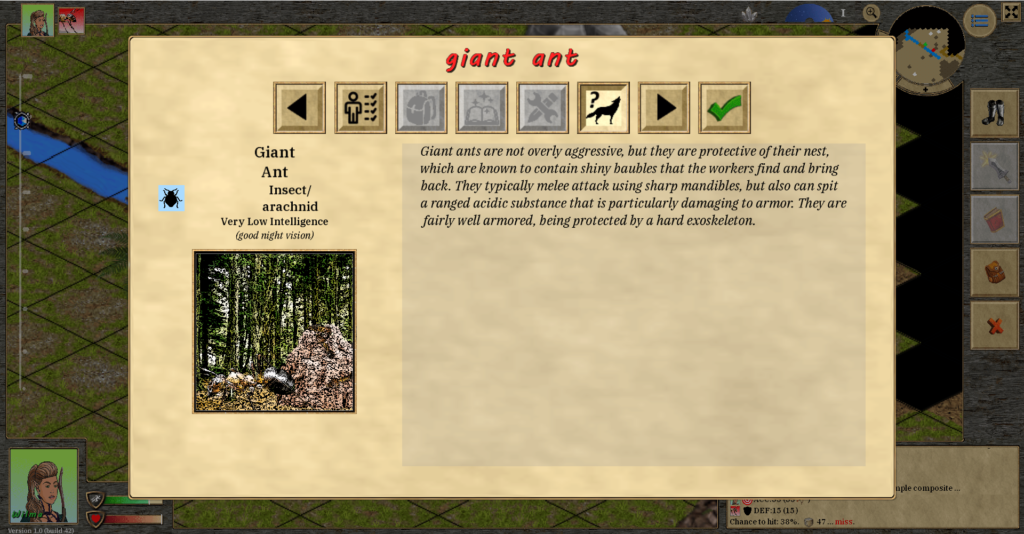 The BESTIARY contains useful information on monsters. Giant ants are simple creatures so not a lot of info, although if you read it you will notice they have an ACID attack. Higher level and more challenging monsters will have a lot more information displayed including some of their known attacks, defenses, and tactics. You should definitely read the bestiary when you encounter a creature you have not encountered before.
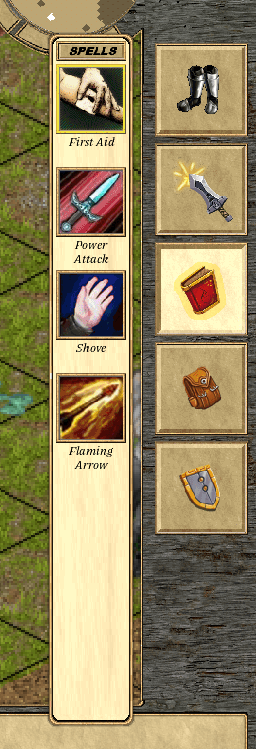
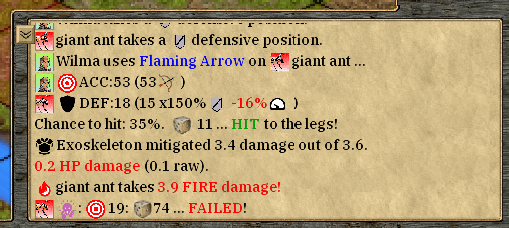 We’ll assume that Wilma chose to use Flaming Arrow. Again, you will see and hear the animations for the attack and possibly some effects (on a hit Flaming Arrow would show some flames burst on the victim). But checking the COMBAT LOG will reveal more details about the attack. We can see here that Wilma had an ACC of 53. However, the DEF line for the giant ant is somewhat different this time. First of all, the giant ant was using


