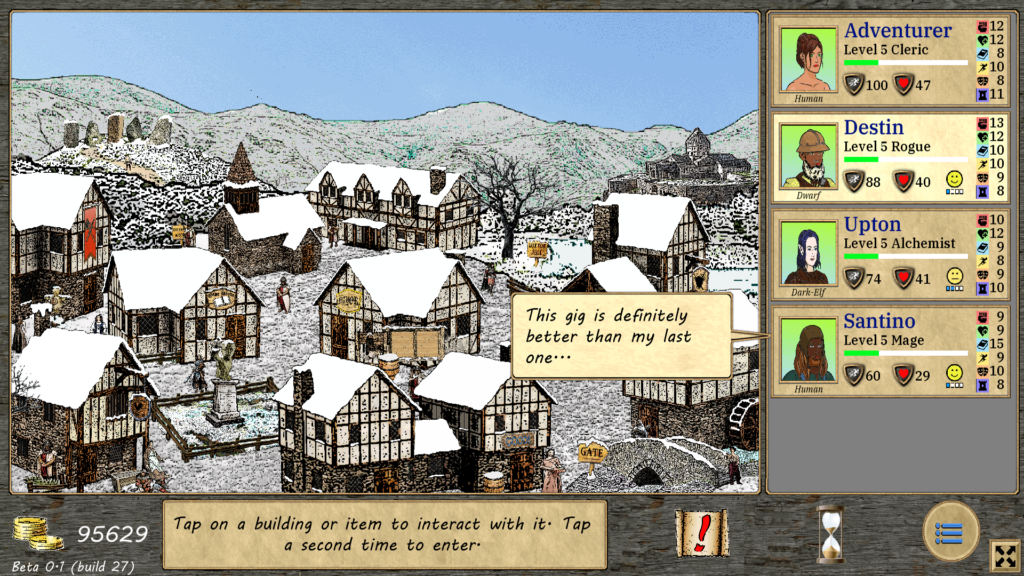
Evervale is where you will spend your time when not venturing through The Gate, exploring fantastic new worlds and battling exotic and dangerous monsters.
When you start a new game, you will first head to the Merchant to sell your gold nugget and purchase a weapon. You’ll only be allowed to purchase a weapon for which you have an AFFINITY and picked the appropriate weapon skill for. Look for the ![]() on a weapon and pick one of those.
on a weapon and pick one of those.
Having just arrived in town, you don’t need a room right away. But after your first excursion through the Gate you’ll need to secure a room for yourself. Weary and bleary-eyed adventurers are frowned upon and the guards at The Gate will definitely take notice if you haven’t lodgings for yourself. Head to the Drunken Rooster Tavern, which is the local watering hole, or the Inn. To enter either, just tap on the building once and you’ll see a description in the banner at the bottom of the screen. Tap a second time to enter. Once inside, select the ROOMS button. No matter which building you entered, when you tap on ROOMS you will be taken to the same screen.
Rooms at the Tavern cost 5 coin per month, paid in advance. The Inn is nicer, but costs 15 coins. And if at any time you don’t have enough coin to spring for the Tavern, you can always take up residence in the Alley behind. That’s free, but … well … you get what you pay for. At least the Tavern has walls. Maybe not a roof, but walls! To “slot” your character to a room, just drag their info box that is in the upper-right corner of your screen and drop it over the room you want to take. You’ll see your character’s portrait fill the box and the money will be paid up front (this is the same way that you slot characters to any activity — just drag them to the box). Usually you will be prompted to confirm before you’re charged for an activity, but not with rooms. And if you slot to one set of rooms, then change your mind and slot to another — tough luck, you’re out the coin for both. So think before you slot a character to a room.
Your whole reason for being in Evervale is to venture to other worlds in search of loot and battling monsters. When you are ready to start your adventure, head to The Gate. To get there, just select the bridge in the lower-right twice.
You don’t need to do it right away, but you will eventually want to explore town. Before we describe what is available, there are some concepts you need to grasp first.
Many buildings in town offer ACTIVITIES. These are things that you or your hirelings can take part in. Most of these cost money but can convey positive benefits, although it does sometimes happen that someone doesn’t have such a good time and acquires a negative effect. But generally the positive outweighs the negative.
Some characters, depending on their class, cannot or will not participate in certain activities. For example, while Mages love it, Fighters will poo poo the idea of reading books and doing research at the Bookstore. Similarly, Mages wouldn’t be caught dead in the fighting pit over at the Armory, whereas Fighters thrive on it. If you attempt to slot a character to an activity that they cannot participate in, they will refuse. This also goes for your main player character.
All classes have a PREFERRED ACTIVITY that not only do they LIKE to participate in, but are REQUIRED to participate in about every 6-9 months (one MONTH is basically one cycle in which you can go through the Gate or perform activities — or both simultaneously with different characters). You will be alerted to when your character or hirelings desire to participate in this, and failure to do so in a timely manner will result in a negative affliction for your character(s) until they do participate. For example, Rangers’ preferred activity is to HUNT in the Evervale Woods. This activity costs 20 coins. Slotting a Ranger to this activity and letting a month pass (by either having others go through The Gate or tapping on the HOURGLASS button) will satisfy their need. They may also pick up a temporary positive effect. Maybe their RANGED ACCURACY will be boosted 10%. Maybe they’ll get increased stamina for a while. They could also potentially get a negative effect, or nothing. But if the Ranger was one of your hirelings, they’ll also get a MORALE boost (more on that down below).
Some activities are meant to fix issues with characters. For example, the HERBALIST over at the Laboratory can fix injuries and cure diseases. Both the Church and the Monastery can CURE negative afflictions (for a price). The Monastery also has a HEALER who is more skilled at fixing injuries than the HERBALIST, but of course is more expensive.
Some activities are instant and do not require a month to pass by. These activities will have a light-blue background, and most of these fix something or typically provide a positive effect, such as EATING A MEAL at the Tavern or the Inn, or CURE at the Church or Monastery.
Some activities involve TRAINING for either abilities or skills. Ability training is specific to a given class, and usually fairly expensive at 100 coins plus 150 coins per level of the trainee. But the benefits of gaining an extra ability can be significant for any character.
Skills training is less expensive at 50 coins plus 50 per level, and different spots in town provide OFFENSE, DEFENSE, SUPPORT and ARMOR skills. These all grant 1 skill point to be spent on a skill of your choice in the given category.
Hirelings are affected by MORALE. This is indicated by colored emojis like this: ![]()
![]()
![]()
![]()
![]()
![]()
![]() . These are displayed prominently on their placeholder in town, as well as on the ATTRIBUTES screen for them. There is also a small set of 4 boxes
. These are displayed prominently on their placeholder in town, as well as on the ATTRIBUTES screen for them. There is also a small set of 4 boxes ![]() that fill with blue to indicate the progress to the next emoji above their current one.
that fill with blue to indicate the progress to the next emoji above their current one.
It is important to keep an eye on your hirelings’ morale. Happy NPC’s receive as much as a +5 ACC and DEF bonus. Unhappy ones can receive up to a -5 ACC and DEF penalty. Additionally, unhappy hirelings have a chance to come to you complaining about how they’re being treated and threatening to quit, which will force you to offer them perks to retain them, or see them walk out the door — likely with any equipment that you gave them and sprung for!
Many things can bring down their morale: bad lodgings (them having to pay for their own lodgings is worse), insufficient loot from excursions, receiving damage in battle, getting an injury or disease, friendly fire, seeing another character die. All of these things will negatively affect their morale.
To counter that, providing diversions in the form of activities (especially those they may be inclined toward) can raise morale. So can better accommodations, a good amount of loot, doing positive things for them in battle (like healing or buffs), or taking time off from excursions.
Your player character is not affected by morale. However, as mentioned before they will still need to participate in their preferred activity periodically. Plus, when they participate in activities there is always a chance for a positive effect which can benefit them.
While we’re on the subject of keeping hirelings happy, it is important to note here that you probably shouldn’t try to hire anyone until your main character is around level 3. There are two reasons for this. First, you will probably be okay going it alone on expeditions for a while. Around level 3 is when things start getting more challenging and may become too much for one person to handle. Second, you’re going to have a hard enough time at the lower levels accumulating enough for decent gear for yourself, let alone someone else. Plus, when you take on hirelings you have to split the loot with them. It really doesn’t make economic sense to do this until you have to. The longer you can hold out without hirelings, the more coin you can accumulate. Also, hirelings have to be kept happy, as you read above, and that takes coin as well.
Here is a list of the buildings in town and the activities they provide:
Drunken Rooster Tavern:  Besides witty banter and useful advice from the Barkeep, you can participate in DRINKING and EATING A MEAL. Also, this is the go-to place to find adventurers to hire. There is usually a fresh batch of them hanging around at any given time, so if you don’t find someone you like, just wait a month or two. Note that bringing on a hireling is a legal contract, and the terms will be spelled out prior to agreeing to recruit them. Read the contract. You can also dismiss current hirelings here.
 Armory: This the place where you can hone your fighting skills. The Master-at-Arms is an expert at whipping sorry slobs into shape. You can PRACTICE at your weapons skills. They also provide ABILITY TRAINING for Fighters as well as OFFENSE SKILL TRAINING for anyone.
 Bookstore: This is a favorite hangout for Mages who love to READ and gain knowledge. They also provide ABILITY TRAINING for Mages as well as DEFENSE SKILL TRAINING for anyone.
 Evervale Woods: Tucked in behind the Armory and the Church is the Evervale Woods, a thick forest teeming with game. This is a Ranger’s paradise where they can HUNT to their heart’s delight. They also provide ABILITY TRAINING for Rangers.
Church: Th ose who are devout in the service of the Old Gods, like Paladins, will frequently want to avail themselves of PRAYING in their sanctuary. They can also CURE negative afflictions and provide ABILITY TRAINING for Paladins. There is an alms box here and it is known that donors are frequently blessed by the Gods.
The Stones: These an cient monoliths pre-date recorded history, but their power is palpable. A favorite activity for Druids is to PERFORM RITUALS HERE. They also provide ABILITY TRAINING for Druids as well as SUPPORT SKILL TRAINING for anyone.
Laboratory: Alche mists EXPERIMENT here to push the boundaries of science (plus blowing stuff up is fun). They also provide ABILITY TRAINING for Alchemists. The HERBALIST is also stationed here, who can cure diseases and is fairly skilled in fixing injuries.
Mayor’s  Office: Although the Mayor himself is much too busy, the Mayor’s Clerk is always here, busy filling out his forms and papers. This is the place to go if you’re looking for ODD JOBS, although it is more convenient to just check the notice board outside. This is also the place to go if you’re looking to purchase a lot to build a house on.
The Gi lded Dragon Inn: This establishment provides nice accommodations — much nicer than the Tavern that is. They also have an established GAMBLING hall where a dice game is almost always going. Try your luck, you may end up winning more than you paid. You can also EAT A MEAL here, which while more expensive than the Tavern’s, they use fresher ingredients that are less likely to give you indigestion!
Mer chant: This is the place to buy weapons, armor, and miscellaneous stuff like torches, lockpicks and crystals. This is also the place to sell your loot when you return from beyond the Gate. Don’t worry, the Merchant will give you the best price in town! He’s the only merchant in town, but it will be the best price. He also provides ABILITY TRAINING for Rogues (that must just be a coincidence).
Mo nastery: This building provides a retreat for Clerics where they can MEDITATE, although anyone is welcome. They can also CURE negative afflictions, and their HEALER is an expert in patching up injuries. They provide ABILITY TRAINING for Clerics.
 Blacksmith: This is the shop to go to for fixing up any damaged armors. He can also provide ARMOR SKILL TRAINING.
 The Gate: Follow the bridge on the east side of town and it will take you to the cave where the Unknown Traveler discovered The Gate. This mystical device is a doorway to other worlds filled with monsters and loot. Demand is so high from adventurers that the Mayor has had to limit parties to one excursion per month. The cost is free for the first traveler, but 10 coins for each additional person.
Each time you come back from an expedition through The Gate, if you were solo you will need to head to the Merchant’s to sell your loot. Keep in mind that you can tap on the SELL ALL button to sell everything marked as loot. However, this will not sell any weapons, armor or useful miscellaneous items like crystals. Those will have to be manually sold one by one by selecting the item and tapping SELL. This is a safety mechanism so you don’t accidentally sell some good stuff you may want to keep.
If you had at least one hireling that came back through with you, you do not have to visit the Merchant. A screen will appear displaying all of the loot collected, including weapons and armors, and what each person’s share of the pile is. If you want to keep particular items, you can select them and move them to the receiving character. Keep in mind that you will always have to “buy out” the shares of that item from everyone else, even if you are giving the item to a hireling to use. That’s just part of being the boss — equipping your hirelings with gear comes out of your pocket.
 Merchant Layaway: See something nice at the Merchant whose price is currently a little out of reach? The Merchant offers a layaway plan for more expensive items. For 10% down, the item will be reserved for 12 months without it rotating out of stock or being sold to someone else. Once you have the money, just buy the item as usual and the deposit will be applied to the purchase price. However, if you don’t purchase within the 12 months, the item will be returned to stock and your deposit will NOT be refunded.